THIS POST MAY CONTAIN AFFILIATE LINKS. PLEASE SEE MY DISCLOSURES. FOR MORE INFORMATION.
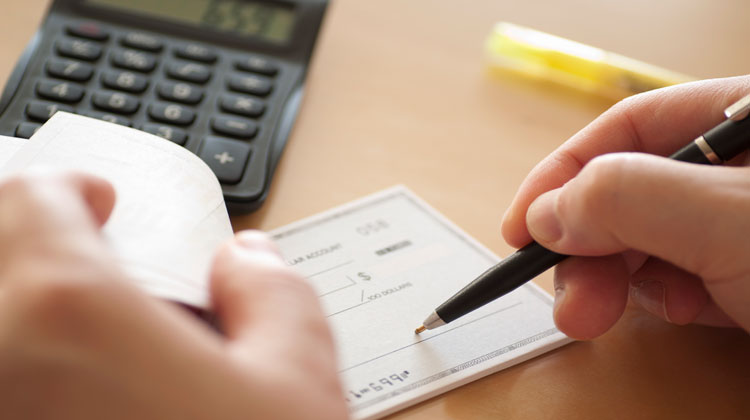
Checks aren’t as popular as they once were, but that doesn’t mean that you won’t find yourself using them from time to time.
In fact, learning how to write a personal check is a critical skill that everyone should have.
And with the help of these tips, I’ll teach you how to write a check in less than one minute.
So if you need to write out a single paper check or a bunch of checks, you can get it done as fast as possible.
6 Steps To Write A Check In Less Than One Minute
#1. Fill Out The Date On Your Check
This is designed to help you and the recipient track and record transactions so that there are no financial mix-ups, especially if you find yourself writing multiple checks at a time.
There are different ways you can write out the date, including:
- December 15 20XX
- Dec 15 20XX
- 12/15/XX
Obviously, the less you have to write the quicker it is, so if you are strapped for time, the best way is to stick with the short date option.
Also, make sure you use the current date, not a future date.
When you use a future date, this is known as postdating and the recipient won’t be cash the check until that date.
#2. Write Who The Check Is For
Next, make sure that you fill in the recipient’s name or organization on the line next to “Pay To The Order Of”.
This is also referred to as the payee line.
This is the part of check writing that tends to take up the most time since you have to know what to write.
- Read now: Learn how to write a check to yourself
If you’re not sure what to write, make sure that you reach out and ask for clarification.
It’s important that the name of the person or company you write on this line is absolutely correct.
The only real way to save time on this section is to write quickly.
But your writing has to be legible enough so that the bank or credit union will actually cash the check.
Otherwise you’ll be wasting your time by writing out another check and voiding this one.
#3. Enter The Numerical Amount Of The Check
Write the amount you wish to pay in the area containing the dollar sign.
All you have to do is put the right number of dollars and cents in the box.
For example, if you’re paying someone $10.20, you will just write that down in the box and omit the dollar sign.
Because checks can be much more susceptible to fraud than other payment options, you should always take care to write the dollar amount clearly and start as close as possible to the edge of the box next to the dollar sign.
This ensures that no one can add a number to the start of your dollar amount or change numbers to make them look like something else.
Saving time here is all about writing quickly.
And if you mess up, don’t worry too much.
This is because if there is a difference between the amount in this section and the written amount in the next section, the financial institution uses the written section below.
This isn’t to say you should just ignore this part of the check, but you could leave it blank and still have the check accepted and deposited.
Finally, if the check you are writing is for an exact amount, say a gift to your niece for $25, you could choose to write “25” as the amount and not “25.00”, saving you a little more time.
Alternatively, you could write “25-“ as well, saving you the time of writing zeros for the cents.
#4. Write Out The Check Amount
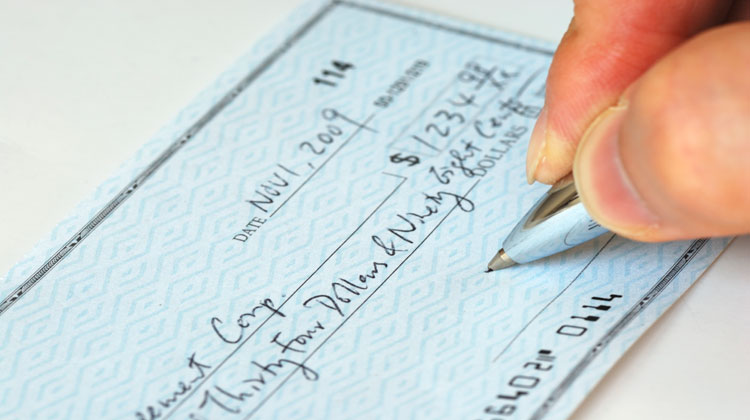
Underneath the recipient line, you’ll find another area to fill in that has the word “dollars” at the end of the line.
Because the opportunity for fraud exists, this line helps you spell out exactly how much you want to pay to the recipient.
Continuing with the above example of a check for $10.20, you would make sure that you’re telling the recipient how much the check is for by writing out “TEN AND 20/100”.
Why is this all in capital letters?
Capital letters make it harder to forge a new number, and it makes it more obvious that something is wrong with the check should someone try to.
For this area of the check, there are very few ways to save time other than to write quickly.
The exception to this is if you have a large number, like $1,545.
You have two options here.
- ONE THOUSAND FIVE HUNDRED FORTY FIVE AND 00/100
- FIFTEEN HUNDRED FORTY FIVE AND 00/100
As you can see, the second option requires less writing and as a result, can shorten the time it takes to write the check.
#5. Sign The Check
Sign the check in the lower right corner of the check after you double check all the areas above to make sure that they’re accurate and correct.
Make sure you use the name registered with your bank.
Having all the right information is key to making sure that your check clears.
This section should take you no more than a few seconds as you are only signing your name.
#6. Memo Section
If you want to, you can always write something on the memo line.
Much like with a digital payment, the memo section allows you to write a note to the recipient to remind them what the check is for.
You could also use this area to help you remember what the check is for if you forget to record it in your check register.
Also, if you are paying a bill, you could write your account number in this section.
This way, if the check and your payment coupon were separated, the billing department can still credit your account with payment.
For example, if the check is for school tuition and you have two kids going to the same school, you could write your child’s name along with “tuition” so you know it paid their tuition.
Of course, if you really want to lessen the time to write a check, you can completely ignore this part.
If the optional memo section blank won’t impact if the check is cashed or not.
There you have it!
With all these tips and a little practice, you know how to write a check in less than one minute.
Next time you need to write a check, refer to this guide to walk you through the process and ensure your check goes through.
Check Writing Tips Everyone Should Follow
Knowing how to write a check is one thing.
Knowing how to successfully track all of these transactions and deal with mistakes is another thing entirely.
Do you want to make sure you’re prepared for writing checks?
If so, here are a few tips that everyone should follow after they’ve learned how to write a check in order to keep your finances in good shape.
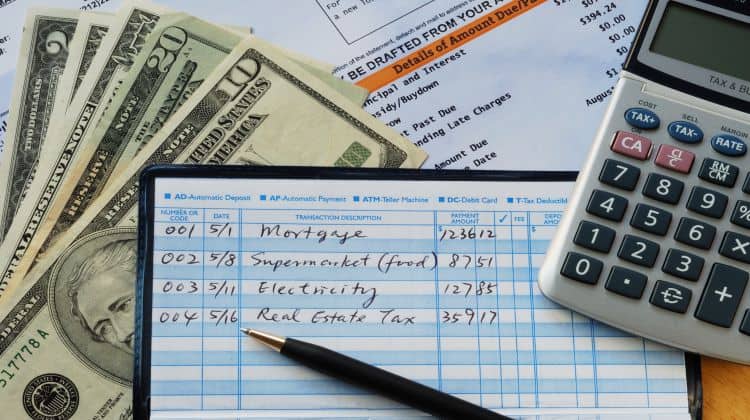
Record Every Check You Write
Whether it’s a change to your initial amount or a blank check that managed to fall into the wrong hands, fraudulent checks are not unheard of.
This is why it’s crucial to record every check you write in your checkbook register so that you know how much money you’ve sent out.
If you see a discrepancy in your bank account, you can look back at your records and report it to your bank.
Most people use the check registry that they receive with their checkbook.
However, you can always use a spreadsheet or whichever other tool is the best fit for you.
Void Your Check When You Make A Mistake
Mistakes happen, but making further mistakes can end up making your check unusable or putting you at risk for fraud.
- Read now: Learn what a voided check is
For example, if you’re in the middle of writing your check and you make a mistake with the numbers and proceed to dispose of that check in an unsafe place, someone could easily use it and take cash out of your account.
One question that comes up in regards to this is, “can I use white out on a check?”
While it may be tempting, using white out is actually considered tampering, which makes it so that your check can’t be cashed.
So, what do you do?
If you’ve made a mistake on your check, always remedy it by writing “VOID” across the face of the check and in all of the blank areas.
Always Write Checks With Blue Or Black Pens
There are some common-sense tips that people may not think about when writing a check.
One of these is using a pen to write the check.
Using a permanent tool is essential as it helps to prevent fraud from taking place.
After all, you can only imagine what would happen if you used a pencil for checks.
Someone could easily erase all of your information and fill out the check with the amount they want.
In fact, I recommend you use the Uni-Ball Signo Gel Pen.
The ink this pen uses is waterproof, so in the event your check gets into the wrong hands, the person won’t be able to remove the ink.

The #1 pen for safe and secure check writing. You'll love this pen so much, it will probably become your every day pen!
Only Write Checks For Amounts You Can Afford
Before you write any check, it’s a good idea to make sure you have enough money in your checking account to cover it.
If you write a check and don’t have enough funds to cover it, the result is your check bounces.
When this happens, you pay overdraft fees and may pay an additional fee to the business you wrote the check out to.
This can be avoided if you have overdraft protection however.
- Read now: What happens if you bounce a check
- Read now: Learn what overdraft protection is
The bottom line is to avoid headaches and fees by reviewing your checking account balance first.
Final Thoughts
At the end of the day, writing a check in less than one minute is easily doable.
It just takes some practice and using the tips outlined above to write less.
The greater the number of checks you write, the faster you will get at it.
If you follow these tips, you will find you spend less time writing checks and more time doing other things you enjoy.
- Read now: What should you do if you lost your checkbook
- Read now: Learn the pros and cons of online banking
- Read now: Here are good money habits to have